Imagine coming home one day and discovering your ceiling is on the floor. This happened recently to one of my clients and I was contacted to find out why this occurred. Apparently there had been cracking on the ceiling that preceded the collapse and similar cracking was found in the bedroom.
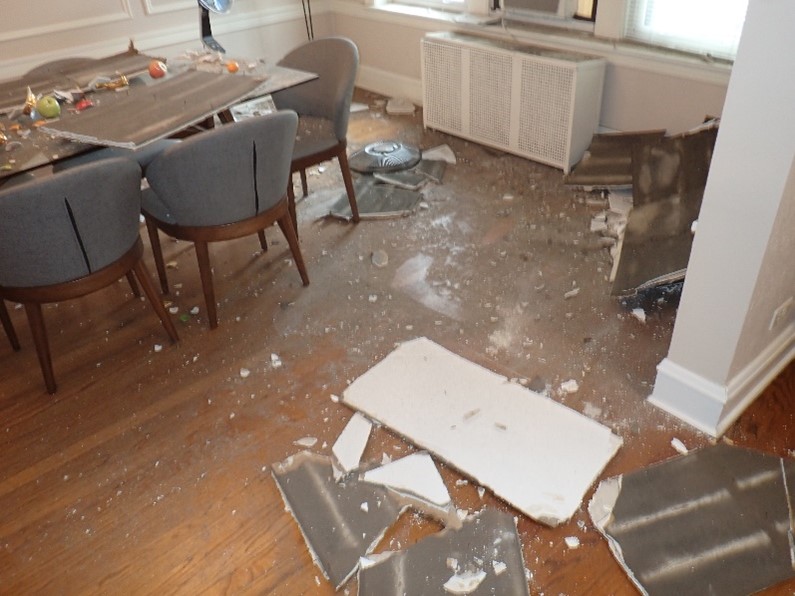
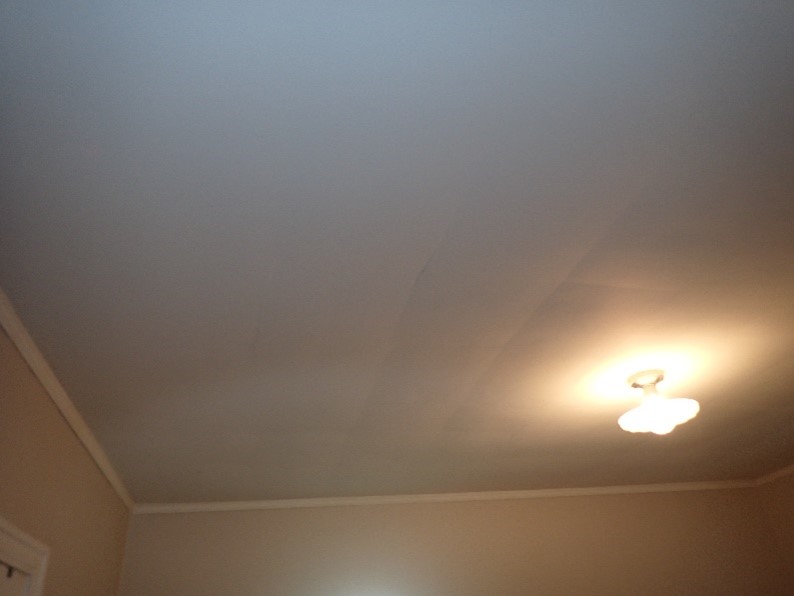
Ceiling failures like this are typically related to moisture and signs of leakage were noted in the joist areas where the ceiling had fallen. There was no active moisture at the time of the inspection and some of the stains and ongoing damage may have been caused by exterior leakage that had been resolved at some point in the past.
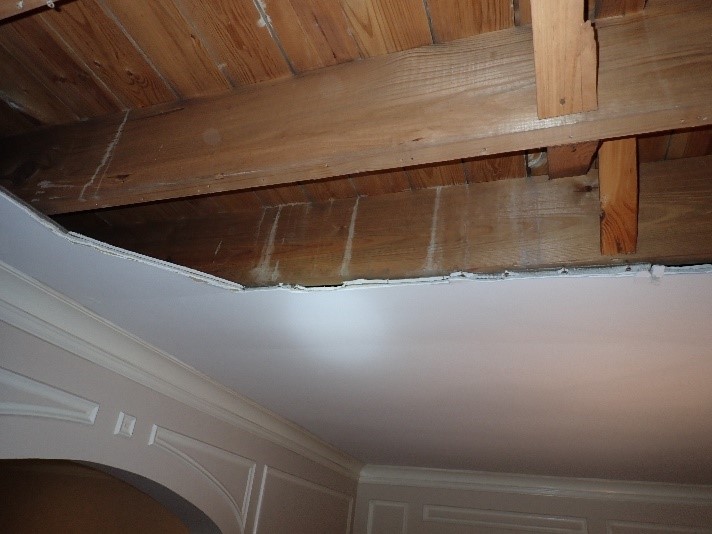
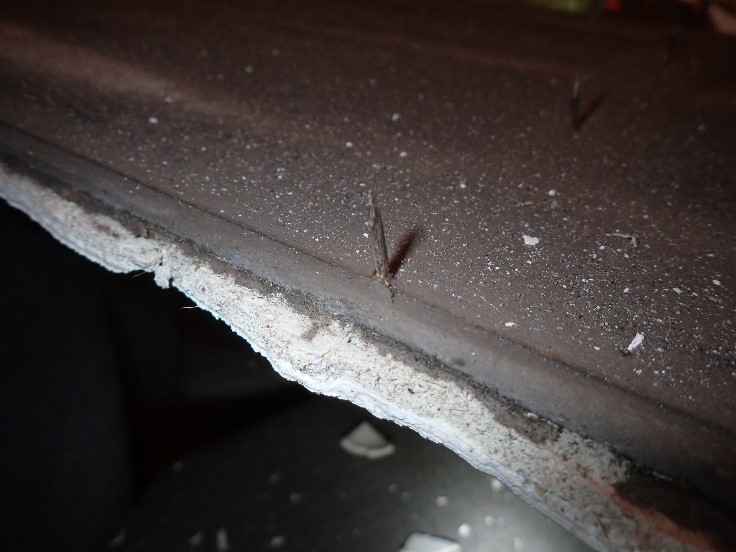
It appears that the leakage saturated the underlying drywall lath which become separated from the nails securing the lath. Ceiling sections begin to sag and eventually become separated from the joist and the weight is then carried by the fasteners on the adjacent joists. It appears the nails used to secure the lath are smooth and the combination of the added weight and movement of the floor joists slowly worked out the nails on the adjacent panels until there was no longer any support for the ceiling.
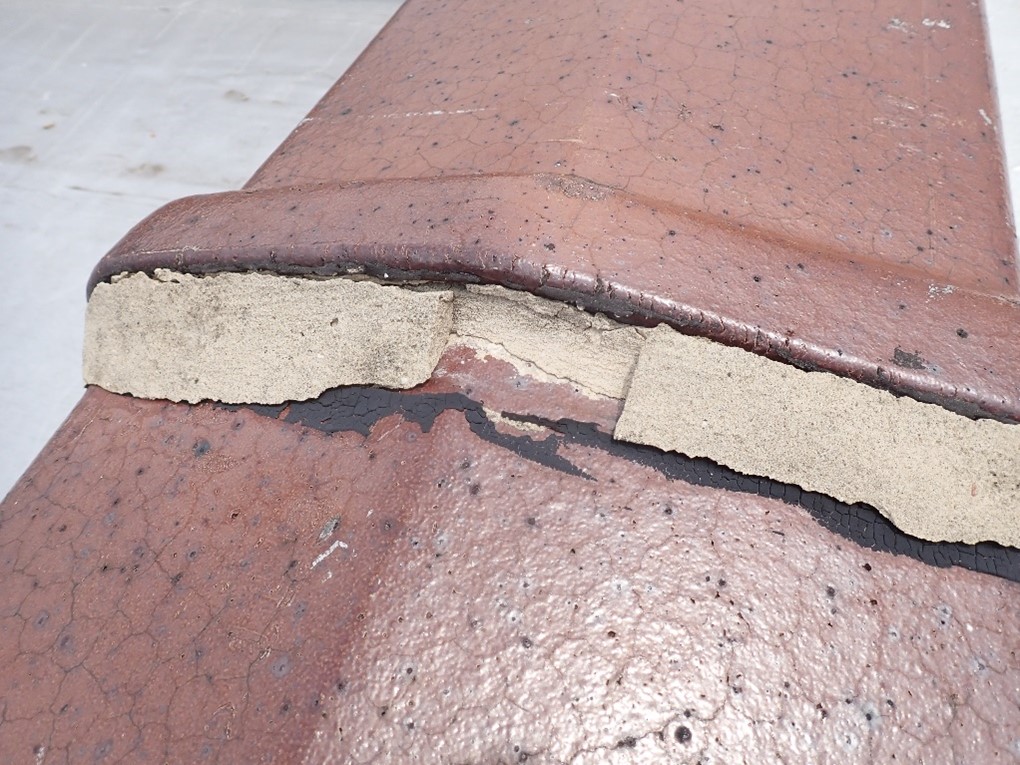
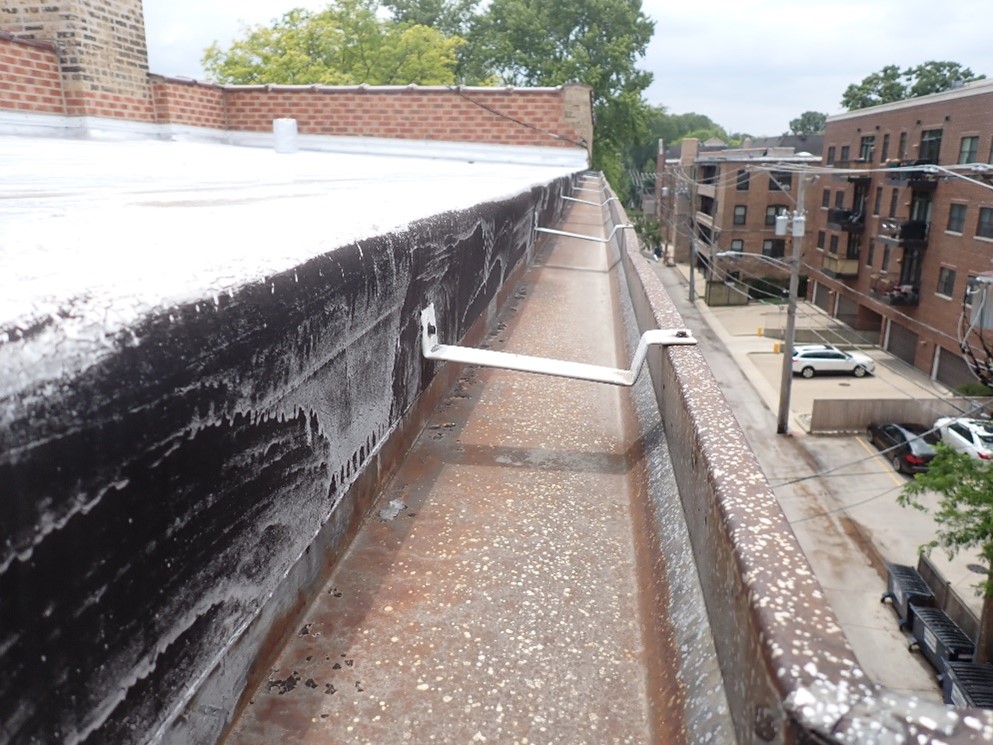
The sources of leakage varied per location and may also consist of multiple exterior sources. The leakage in the dining room is thought to be caused by leakage from open caulk and masonry joints and the cracking in the bedroom is most likely related to moisture from ice damming that appears to have been occurring on the rear gutter areas, possibly as a result of rapid snow melt from minimal attic plenum insulation and/or poor ventilation of the attic plenum.

While it appears that the Homeowners Association for this building had been responsive to leakage over time, it was not until after the leakage had occurred and the damage had been done. The key to preventing this type of collapse is with an ongoing inspection and maintenance program.
If the structure has not been evaluated in some time or ever, a comprehensive examination of the exterior will reveal potential leakage sources. Once these have been identified, a systematic program to seal the exterior of the structure should be developed. Whether it involves the removal of old ineffective caulk, masonry re-tuckpointing or some other causal factor, all of the exterior leakage sources should be addressed via the appropriate means and materials and via the appropriate contractors that can perform the work.
In many cases the leakage occurs because of improper construction details that have eventually failed and when these locations are repaired, they should be corrected using appropriate repair methods that may differ from the original construction. Case in point is mortar joints in masonry structures that are used in locations where caulk should have been used. The typical repair response to this is to smear these open joints with caulk as has been done on the structure that was examined. This repair is temporary at best as the joints typically re-open because the caulk is a thin smear and is not adhered to the materials that are moving. In this case these mortar joints should be raked out and a properly configured caulk joint should be installed.
Ceiling collapses like this can be avoided, however, the key is to regularly inspect and maintain the exterior of the structure. The interior of the structure should also be examined for pattern cracking on the ceilings, specifically the ceilings in areas that lie near outer walls.
In order to reduce the potential for injuries, early symptoms like cracking on the ceiling should be noted and possibly remediated prior to a collapse. Stabilizing the ceilings typically involves installing screws throughout the ceiling and then a skim coat may be needed to conceal the cracking on the ceiling.
According to the homeowners association this was not the first collapse and the bigger question remains – who is going to pay for the damage and repairs. Given that this collapse was potentially related to exterior building leakage that was the responsibility of the HOA, shouldn’t they be responsible for the repairs.
The bottom line to avoid this is to recognize the potential signs of a collapse early and then involve the HOA (if one is present) or building management on preventative repairs and maintenance.
